Microsoft Compatibility Telemetry is a Windows service that collects and sends data periodically from your computer to the Windows development team for Windows’ performance improvement, compatibility improvement, bug repair, etc. Its executable file is CompatTelRunner.exe, located in the C:\Windows\System32 folder.
However, some people report that the Microsoft Compatibility Telemetry is eating their disk and CPU usage, which will slow down or freeze their PCs.
5 Ways to Fix the Microsoft Compatibility Telemetry High CPU/Disk Issue
Way 1. Close the Microsoft Compatibility Telemetry Process
Closing Microsoft Compatibility Telemetry can prevent this software from running and taking up PC resources. Here is the guide:
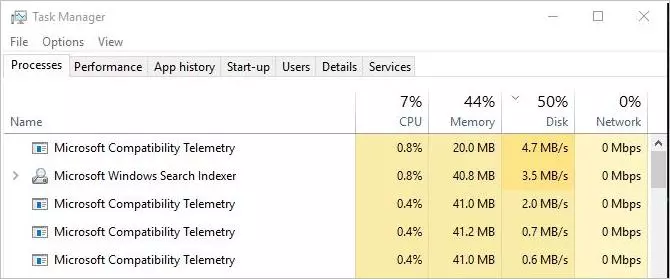
- Right-click the taskbar and select Task Manager from the context menu.
- under the Processes tab, right-click the Microsoft Compatibility Telemetry process and choose End task from the context menu.
Way 2. Update Windows
In general, Microsoft Compatibility Telemetry won’t eat too much Disk and CPU resources. The Microsoft Compatibility Telemetry high disk or high CPU issue may be caused by system errors. Therefore, I recommend you update Windows to remove these errors. Here is the guide:
- Press the “Windows + I” keys to open the Settings window.
- Go to Update & Security > Windows Update.
- Click Check for updates.
Way 3. Disable Microsoft Compatibility Telemetry
This way can also prevent Microsoft Compatibility Telemetry from running. Here is the guide:
- Press the “Windows + R” keys simultaneously to call out theRun dialog.
- Enter “gpedit.msc” in the Run box and then press the Enter key to open Group Policy Editor.
- Navigate to Computer Configuration > Administrative Templates > Windows Components > Data Collection and Preview Builds.
- On the right panel, double-click Allow Telemetry.
- On the pop-up window, choose Disabled and click OK to save the change.
Way 4. Delete Microsoft Compatibility Telemetry
You can even delete this software to get rid of the Microsoft Compatibility Telemetry high disk or high CPU issue thoroughly. Here is the guide:
Step 1: Go to the C:\Windows\System32folder to find the CompatTelRunner software.
Step 2: Change permission settings so that you can delete this software.
- Right-click the CompatTelRunner software and choose Properties.
- Navigate to the Security tab and click the Advanced button.
- Click the Change button that follows the Owner.
- Click the Advanced button in the new window.
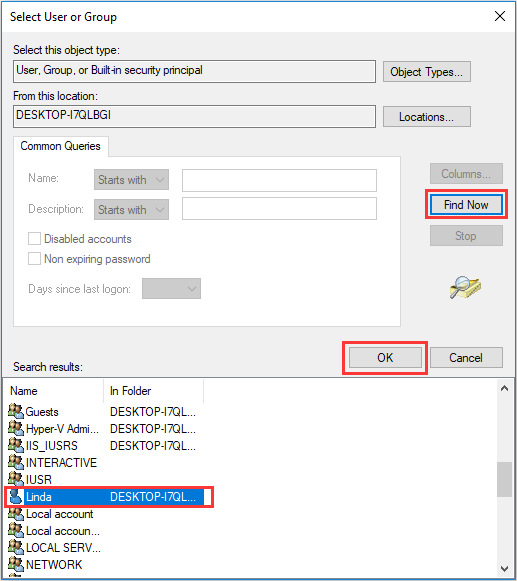
- Click Find now and scroll down to select your account.
- Click the OK and Apply buttons to save and execute changes. Then, click OK when a note window pops up.
- OpenProperties again and click the Edit button this time.
- Highlight Administrators and check Full control under Allow.
- Click OK to save the change. And click OK again when a warning window pops up.
Step 3: Now, you can delete CompatTelRunnersoftware successfully.
Way 5. Wipe Hard Drive and Reinstall Windows
If you have tried all the above methods and the Microsoft Compatibility Telemetry high CPU/disk issue persists, I recommend you run an antivirus scan. If this method also doesn’t solve the issue, I recommend you wipe the hard drive using partition software and then reinstall Windows. This will remove almost all PC issues. Here is the guide:
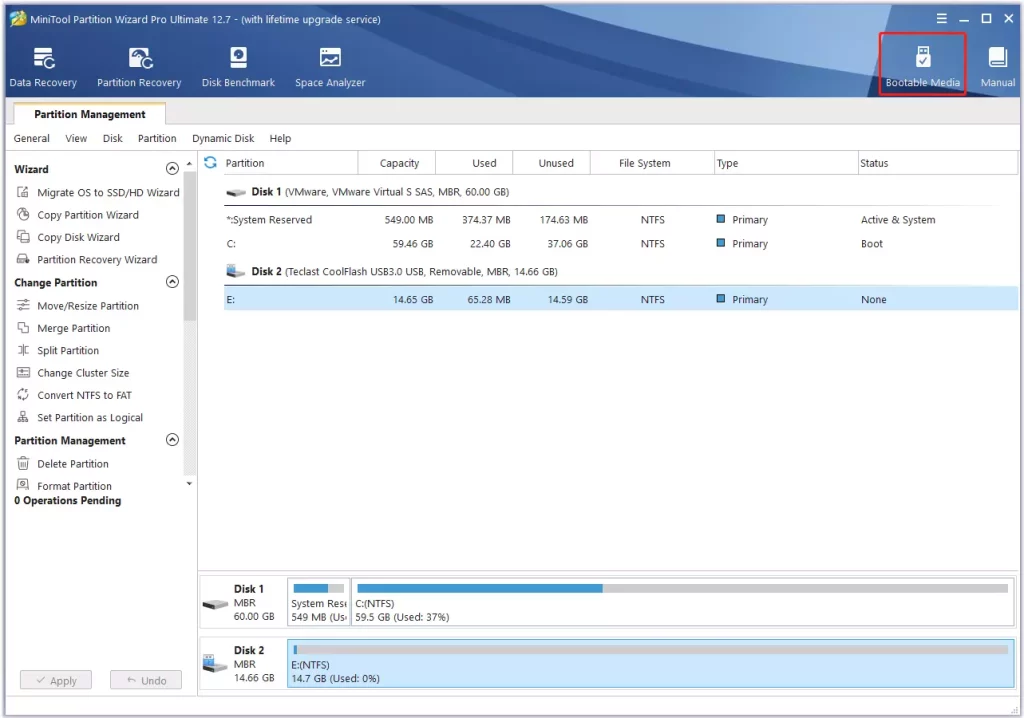
Step 1: Insert a USB drive into your PC and launch MiniTool Partition Wizard. Click Bootable Media.
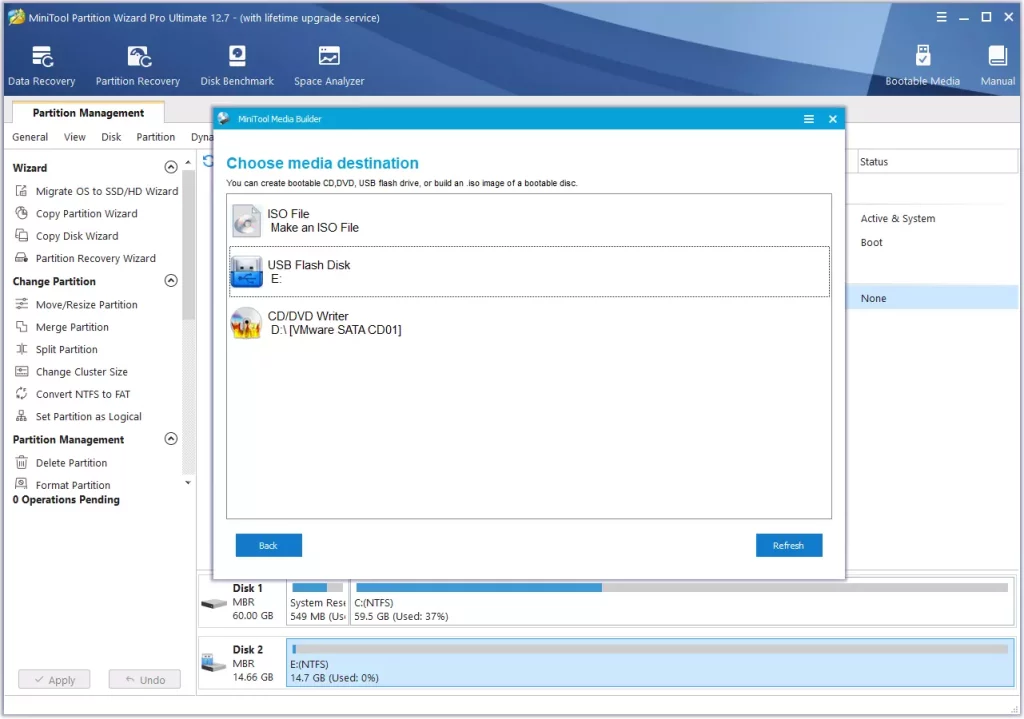
Step 2: Click WinPE-based media with MiniTool plug-in. Then, click USB Flash Disk. It will tell you the data on the USB disk will be destroyed. Are you sure you want to build a USB boot disk? Click Yes. Then, wait until the process is completed. Click Finish.
Step 3: Close all software and shut down your PC. Make sure the MiniTool bootable disk is plugged into your PC. Power on your PC and press the BIOS key (Del, F2, Esc, etc.) when the PC logo appears. Now, you are in the firmware. Set the USB drive as the boot device. Save changes and exit the firmware.
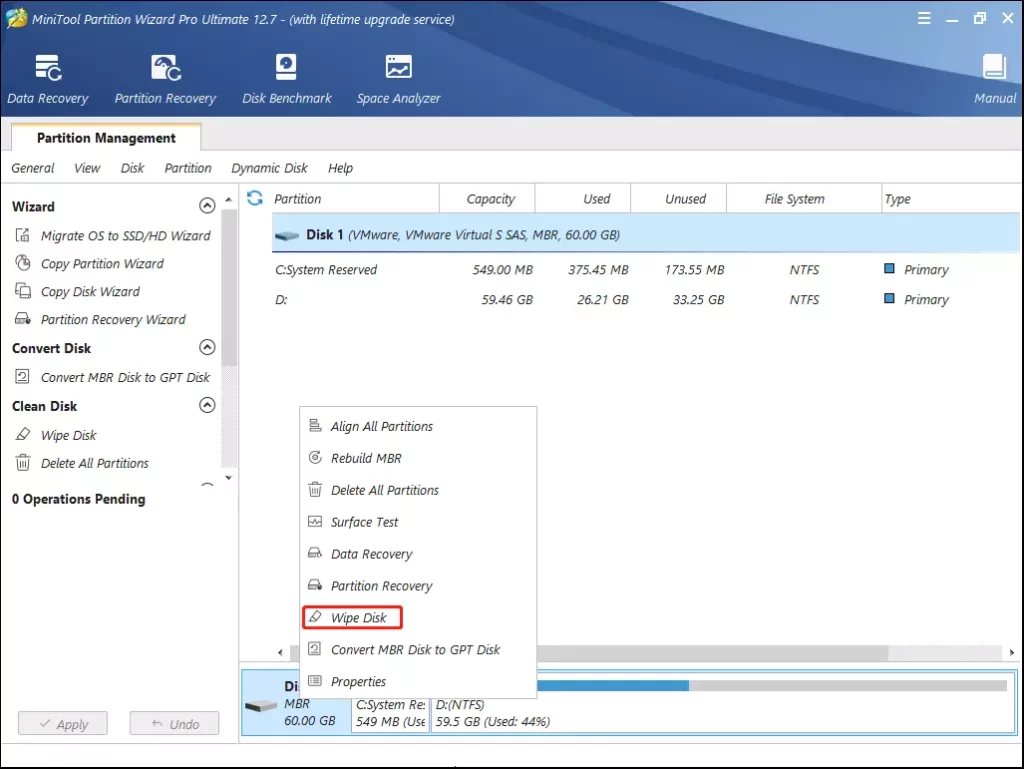
Step 4: After the computer boots from the bootable disk, don’t do any operations. Wait until the MiniTool Partition Wizard main interface appears. On the interface, right-click the system disk and choose Wipe Disk. A warning window will pop up. Click Yes.
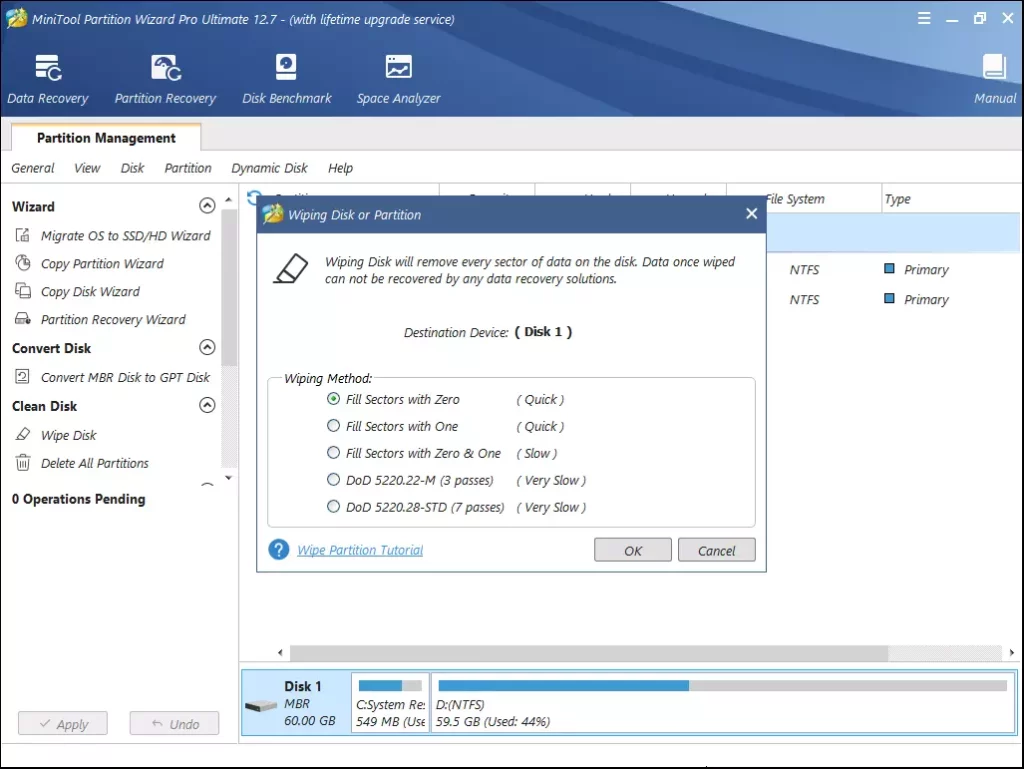
Step 5: Select a wiping method and click OK.
Step 6: Click the Apply button to execute pending operations.
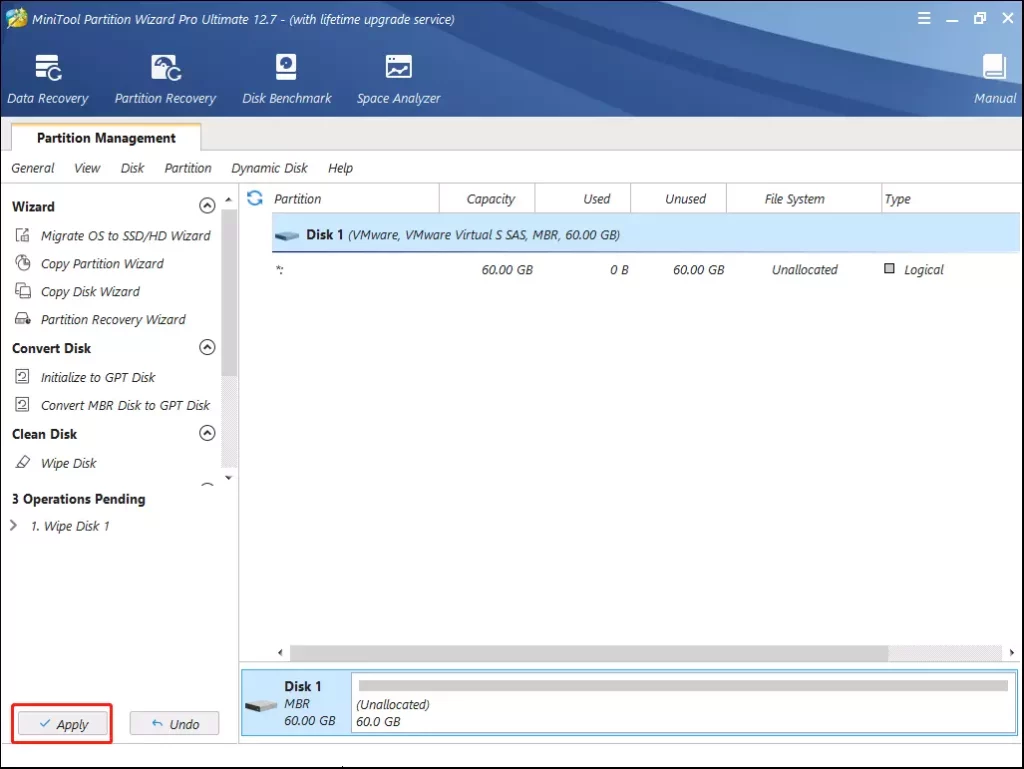
Then, you can plug in the Windows 10 installation media to reinstall Windows 10.
If the Microsoft Compatibility Telemetry high CPU/disk issue occurs still, you can also this partition manager to check whether the hard drive is failing.