Do you want to know that How to Enable VP9 in Chrome Browser? Don’t worry, this article will help you to enable VP9 Codec in Chrome. VP9 is a video codec used in the Google Chrome web browser to compress and decode video content.
[quads id=1]
VP9 was developed by Google and is designed to provide high-quality video at lower bitrates, making it an ideal choice for streaming video over the internet. Note that enabling VP9 may increase CPU usage and may not be supported by all devices or operating systems.
How to Enable VP9 Codec in Chrome?
- Open Google Chrome on your computer.
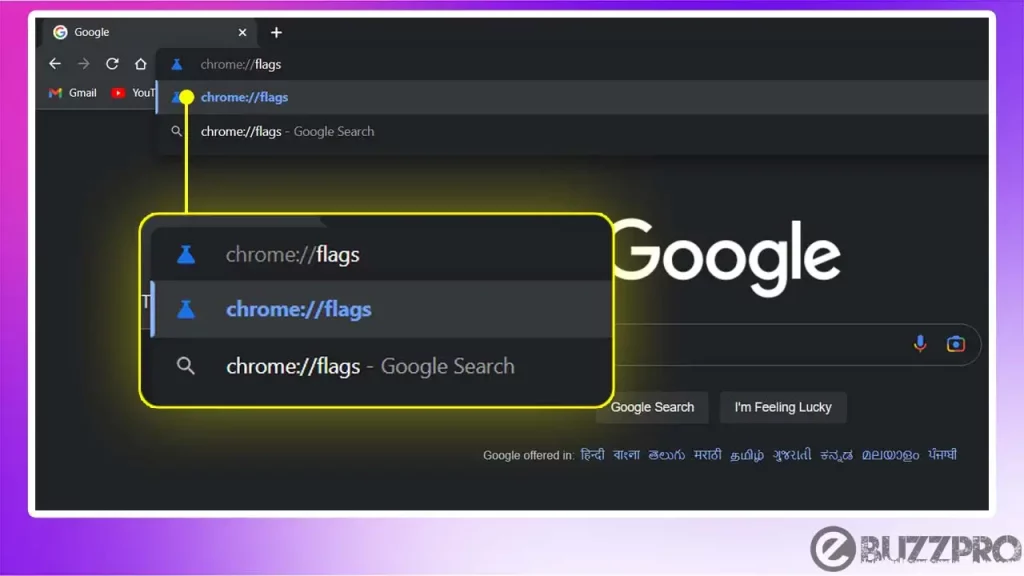
- In the address bar, type “chrome://flags” and press Enter.
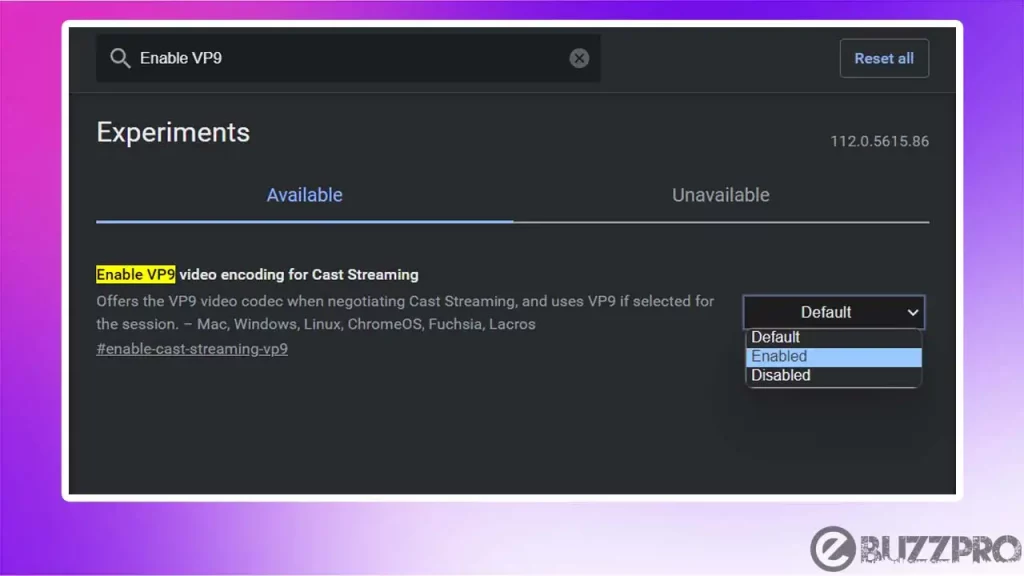
- Scroll down the page to find the “Enable VP9” option. You can also use the search bar at the top to quickly find the option.
[quads id=1]
- Click on the drop-down menu next to “Enable VP9” and select “Enabled”.
- Click the “Relaunch” button at the bottom of the page to restart Chrome with the new settings.
After following these steps, VP9 should be enabled in Chrome, and you should be able to stream videos in VP9 format if the website you are using supports it. Note that enabling VP9 may increase CPU usage and may not be supported by all devices or operating systems.
Conclusion – Friends, how did you like this “How to Enable VP9 in Chrome“ article? Do tell us by commenting below. Also, do share the post with your friends.